
Mastering downhill mountain biking demands precision, confidence, and respect for the terrain. From navigating steep descents to hitting technical features at speed, proper technique transforms challenging trails into pure adrenaline-fueled joy. Whether you’re dropping into your first downhill run or looking to push your limits on black diamond trails, understanding fundamental body positioning and bike control creates the foundation for safe, thrilling descents.
Position your body behind the saddle on steep sections, arms and legs flexed like shock absorbers, ready to respond to the trail’s demands. Your eyes should scan the trail ahead, not directly in front of your wheel, allowing you to anticipate obstacles and choose smooth lines through technical sections. Keep your fingers loose on the brakes – death-gripping the levers reduces control and leads to arm fatigue on long descents.
Ready to progress from basic technique to advanced riding? We’ll break down essential skills step by step, from body positioning and brake control to cornering dynamics and obstacle management. These proven techniques, refined by local riders on New Hampshire’s legendary trails, will help you ride faster, safer, and with more confidence on any downhill terrain.
Essential Safety Gear for Downhill Success
Protective Equipment Checklist
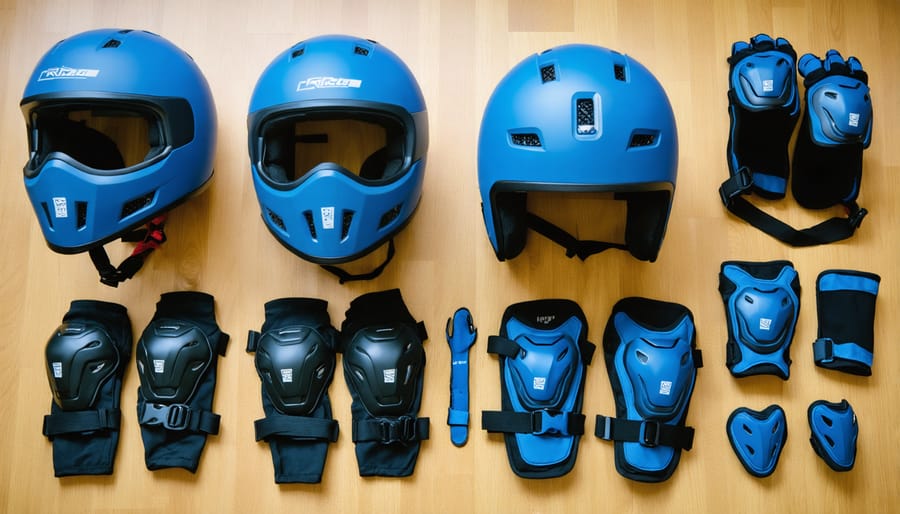
Before hitting the trails, make sure you’re geared up with all the essential safety equipment. Start with a properly fitted full-face helmet – this is non-negotiable for downhill riding. Your helmet should feel snug but comfortable, with a secure chin strap and good visibility through the face shield.
Protect your upper body with a chest protector and back plate, along with elbow and shoulder pads. These will absorb impacts and prevent serious injury during unexpected tumbles. Don’t forget knee and shin guards – they’re crucial for protecting your legs from both crashes and flying debris.
Quality gloves with reinforced palms and knuckle protection will save your hands from blisters and impacts. Consider wearing a neck brace for additional protection, especially when tackling more challenging terrain.
Round out your gear with sturdy riding shoes that provide good grip on the pedals and ankle support. While all this equipment might seem like a lot at first, you’ll quickly get used to wearing it, and it’ll become second nature before you know it!
Bike Setup Fundamentals
Before hitting the trails, getting your bike dialed in is crucial for a safe and enjoyable downhill experience. Start by setting your tire pressure slightly lower than usual – around 25-30 PSI – to maximize grip on rocky terrain. Your suspension setup makes a huge difference: aim for about 25-30% sag in both front and rear shocks, and adjust the rebound to match trail conditions.
Position your brake levers at a 45-degree angle, allowing your arms to remain relaxed while maintaining quick access. Your seat should be lowered to give you plenty of room to move around on the bike. For better control, rotate your handlebars slightly upward and ensure your stem length keeps you in a balanced, centered position.
Check that your chain guide is properly aligned and secure – you don’t want a dropped chain on a steep descent! Finally, make sure your pedals are clean and grippy, as good foot placement is essential for maintaining control. Remember to double-check all bolts and components before every ride – safety first!
Body Position Secrets
Attack Position Mastery
Your attack position is your foundation for confident downhill riding, and mastering it will make all the difference in your mountain biking adventures. Think of it as your ready-for-anything stance that keeps you balanced and prepared for whatever the trail throws your way.
Start by standing up on your pedals with your arms and legs slightly bent – they’re your natural shock absorbers. Keep your pedals level and parallel to the ground, with your weight centered between them. Your chest should be low and forward, hovering just behind your handlebars, while your hips stay back behind your seat.
Imagine there’s a straight line running from your shoulders through your hips to your heels – this is your power position. Keep your head up and eyes forward, looking about 15-20 feet ahead on the trail. Your elbows should be slightly out, like chicken wings, giving you the leverage you need to maneuver your bike.
The key is staying loose and mobile. A rigid stance will work against you on rough terrain, so keep your body relaxed but ready. Practice shifting your weight slightly backward on steeper sections and forward when the trail levels out. This dynamic positioning helps maintain traction and control, especially when the going gets technical.
Remember, your attack position should feel natural and comfortable – it’s your home base on the bike, the stance you’ll return to again and again throughout your ride.

Dynamic Movement
Your body position is your secret weapon in downhill mountain biking, acting like a natural suspension system that helps you tackle any terrain with confidence. Start by maintaining a neutral stance: knees slightly bent, elbows out, and your weight centered over the bike. As you encounter different features, your body becomes a dynamic part of the ride.
When approaching steep descents, shift your weight back and lower your center of gravity by dropping your heels and extending your arms. This helps prevent you from going over the handlebars and maintains better control. For uphill sections or technical climbs, lean forward slightly while keeping your chest low to maintain traction on your front wheel.
As you master mountain bike jumps and drops, remember to stay loose and fluid. Keep your arms and legs relaxed but ready, acting as shock absorbers. When hitting berms or corners, lean your bike more than your body – imagine drawing a straight line from your head to the ground through your inside foot.
For rough, rocky sections, hover just above your saddle with level pedals. This “attack position” lets you absorb impacts and quickly respond to changes in terrain. Remember to keep your eyes forward, scanning the trail ahead so you can anticipate and smoothly adjust your body position for whatever comes next.
Braking and Speed Control
Smart Braking Techniques
Mastering your braking technique is crucial for a safe and enjoyable downhill ride. The key is to brake before you need to, not during challenging sections. Always scan the trail ahead and adjust your speed before entering technical features or corners.
Use both brakes together for maximum control, applying gentle, even pressure rather than grabbing them suddenly. Your front brake provides about 70% of your stopping power, but use it carefully to avoid going over the handlebars. The rear brake helps stabilize your bike and control your speed, especially in loose conditions.
Remember to brake while your bike is upright and in a straight line whenever possible. Release the brakes before entering corners to maintain traction and allow your bike to roll smoothly through the turn. If you need to slow down in a corner, gently feather your rear brake while keeping your weight centered.
Practice modulating your brake pressure – think of it like squeezing a ripe fruit rather than crushing it. This subtle control allows you to maintain traction while managing your speed effectively. As you gain confidence, you’ll develop a feel for exactly how much braking force different situations require.
Speed Management
Managing your speed effectively on downhill trails isn’t just about squeezing those brake levers. Smart riders use a combination of techniques to maintain better control while keeping their momentum flowing smoothly.
Start by looking ahead and planning your line through upcoming terrain. This allows you to naturally control speed by choosing wider paths around turns instead of straight lines that require heavy braking. Use the natural contours of the trail to your advantage – slight uphills or flat sections are perfect opportunities to shed speed without touching your brakes.
Your body position plays a crucial role too. Standing tall creates more wind resistance and naturally slows you down, while staying low helps you maintain speed when needed. Try pumping through rollers and dips – pushing down into drops and pulling up over rises – to manage your velocity while maintaining flow.
When you do need to brake, do it before corners and technical features, not during them. Apply both brakes evenly and gradually rather than grabbing handfuls in panic. Remember, smooth riding is fast riding, and controlling your speed effectively makes the whole experience more enjoyable and safer.
Trail Reading and Line Choice
Terrain Analysis
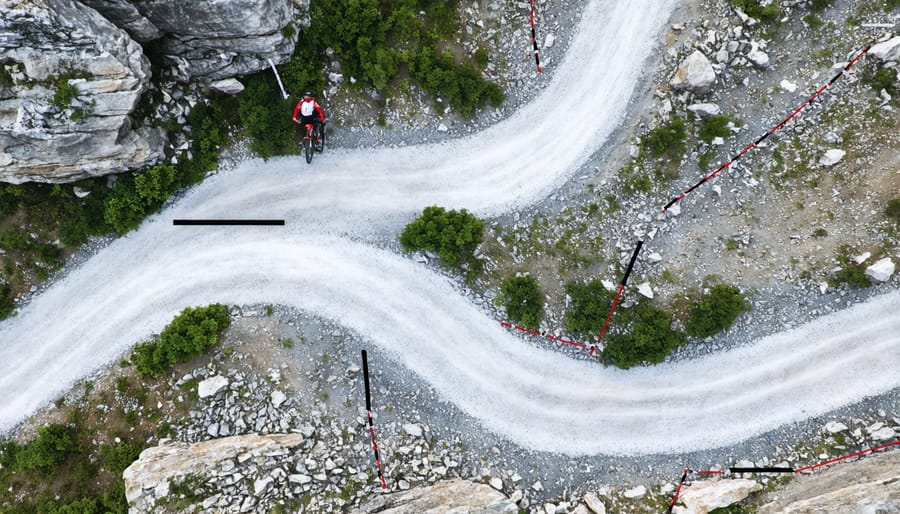
Reading the trail ahead is like having a conversation with the mountain. Start by scanning 20-30 feet ahead, looking for key features like roots, rocks, drops, and berms. This gives you plenty of time to plan your line and adjust your speed accordingly.
Pay attention to surface changes – from loose gravel to hard-packed dirt, or wet roots to rocky sections. Each requires slightly different handling. Notice how the trail flows and connects different features. Are there natural roller sections that could help you maintain momentum? Where might you need to brake before entering a technical section?
Look for ‘escape routes’ – safer alternative lines you can take if you’re not feeling confident about a particular feature. These might be wider sections of trail or smoother paths around obstacles. Natural trail markers like trees or distinctive rocks can help you anticipate what’s coming up next, especially on familiar trails.
Remember to scan both the immediate path and further ahead, developing a rhythm of looking close and far. This “head up, eyes forward” approach helps you stay balanced and prepared for whatever the trail throws your way.
The best riders make terrain reading look effortless, but it’s a skill that develops with practice and experience on various trails.
Line Selection Strategy
Choosing the right line down a trail is like picking your path through a maze – it can make the difference between a smooth, controlled ride and a challenging one. Start by scanning the trail ahead, looking about 20-30 feet in front of you to spot potential obstacles and features. This “read-ahead” technique gives you time to plan your approach and make adjustments.
Look for the path of least resistance, which often means avoiding loose rocks, roots, and deep ruts when possible. However, sometimes the straightest line isn’t always the fastest or safest. Consider factors like your speed, skill level, and the terrain’s conditions when making your choice.
A helpful technique is to break the trail into segments, focusing on one section at a time. Identify key markers or reference points that can guide your line, such as large trees, rocks, or berms. When approaching corners, look for the smoothest entry point and aim to exit wide, which sets you up better for the next section.
Remember to stay flexible with your line choice – conditions can change, and what worked during practice might need adjustment during your actual ride. Trust your instincts and always have a backup plan if your primary line doesn’t work out.
Common Mistakes and Solutions
Even experienced riders started as beginners, and recognizing common mistakes is a crucial part of mastering essential techniques. Let’s look at some typical errors and their solutions to help you progress safely and confidently.
Looking down directly in front of your wheel is a natural instinct, but it limits your ability to anticipate obstacles. Instead, keep your eyes focused 15-20 feet ahead, allowing you to plan your line and maintain better balance. Another frequent mistake is riding with stiff arms and a death grip on the handlebars. This reduces control and increases fatigue. Keep your arms relaxed and slightly bent, ready to absorb impacts.
Many beginners lean too far back on steep descents, which reduces front wheel traction and control. While it feels safer, the better approach is to maintain a centered position over your bike, with your weight balanced between both wheels. Only shift slightly back when necessary for particularly steep sections.
Incorrect brake usage is another common issue. Grabbing the brakes hard in panic situations often leads to skidding and loss of control. Practice progressive braking – gradually increasing pressure as needed – and try to brake before turns rather than during them.
Finally, many new riders forget to adjust their seat height for descents. A slightly lower seat position gives you more room to move and increases confidence. Just remember to raise it back up for climbs and flat sections.
Mastering downhill mountain biking takes time, dedication, and consistent practice, but the thrill of confidently navigating challenging terrain makes it all worthwhile. Remember to always prioritize safety by wearing proper protective gear and regularly maintaining your bike. Start with basic techniques on easier trails and gradually progress to more challenging features as your skills improve.
Focus on maintaining proper body position, looking ahead, and managing your speed effectively. These fundamental skills will serve as your foundation for tackling more advanced terrain. Practice each technique individually before combining them, and don’t hesitate to walk sections that feel beyond your current ability level.
Most importantly, listen to your instincts and ride within your comfort zone. Join local riding groups, take lessons from experienced instructors, and remember that every rider started as a beginner. With patience, dedication, and a safety-first mindset, you’ll develop the confidence and skills needed to enjoy the exciting world of downhill mountain biking.
Stay safe, have fun, and see you on the trails!