
Position yourself downwind and stay low when approaching animals—this simple technique reduces your scent detection and keeps you from appearing threatening, allowing you to capture natural behaviors up close. Pack a camera with at least 10x optical zoom or rent telephoto equipment before your trip, giving everyone in the family the ability to photograph distant wildlife without disturbing their habitat. Set your camera to continuous shooting mode and take multiple shots of the same moment, especially when animals are moving or interacting, because even experienced photographers know the perfect expression or pose happens in a split second.
The magic of wildlife safari photography isn’t about expensive gear or professional training—it’s about being present in those extraordinary moments when a lion yawns at sunrise or a family of elephants crosses your path. Your smartphone can capture stunning images if you understand basic composition rules like the rule of thirds and natural lighting. Morning golden hours between 6-9 AM offer the softest light and most active wildlife, while harsh midday sun creates unflattering shadows that wash out your subjects.
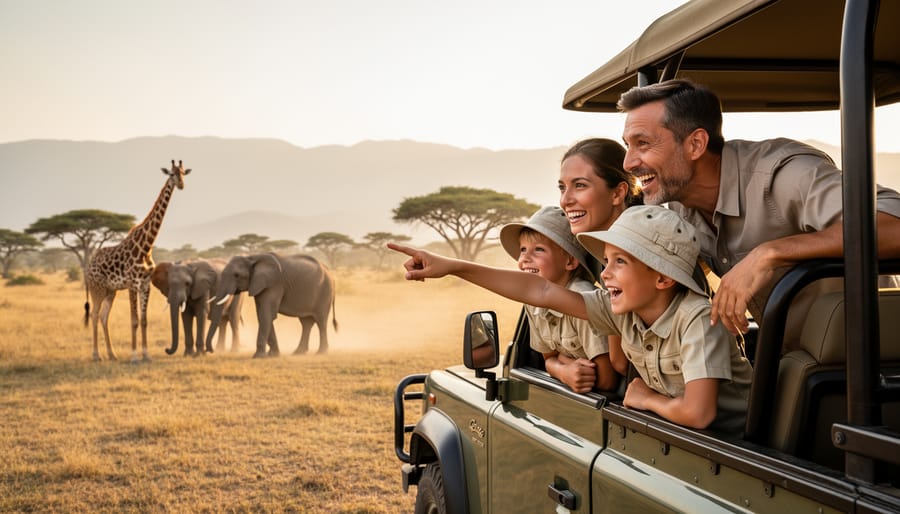
Involve every family member by assigning photography roles: one person tracks animal movements, another watches for interesting backgrounds, and younger children can spot birds or smaller creatures that adults often miss. These collaborative efforts transform photography from a solitary activity into a shared adventure that deepens your connection to the wilderness. The images you bring home won’t just document what you saw—they’ll tell the story of how your family experienced the wild together, creating memories that last far beyond the safari itself.
Why Wildlife Safari Photos Matter for Family Memories
Safari photos hold a special place in family memory-keeping that goes far beyond typical vacation snapshots. Unlike photos from beach resorts or theme parks, wildlife images capture unrepeatable moments—that split second when a fox emerged from the brush or when your daughter spotted her first wild turkey. These aren’t staged scenes; they’re authentic encounters with nature that tell the story of discovery and wonder.
The educational value of these photos extends long after your adventure ends. When your kids flip through safari images weeks or months later, they naturally ask questions: “What was that bird called again?” or “Why do deer have antlers?” This opens the door for ongoing learning about ecosystems, animal behavior, and conservation. Research shows that environmental education provides clear benefits for children’s development, and your safari photos become personalized teaching materials that make these lessons stick.
These images also strengthen family bonds in unexpected ways. When you gather around the table and relive the morning you tracked a beaver or the afternoon you watched hawks soaring overhead, you’re building a shared narrative. Each family member remembers different details—who spotted the animal first, what joke Dad made, how quiet everyone became. These stories get retold at holidays and shared with friends, becoming part of your family’s unique identity.
Local naturalists in Chesterfield often note how families who actively photograph wildlife tend to become more engaged with nature year-round. Those photos on your wall or phone serve as daily reminders of what’s waiting right outside your door, inspiring the next adventure and keeping that sense of discovery alive in everyday life.
Essential Gear That Won’t Break the Bank
Camera Options for Different Skill Levels
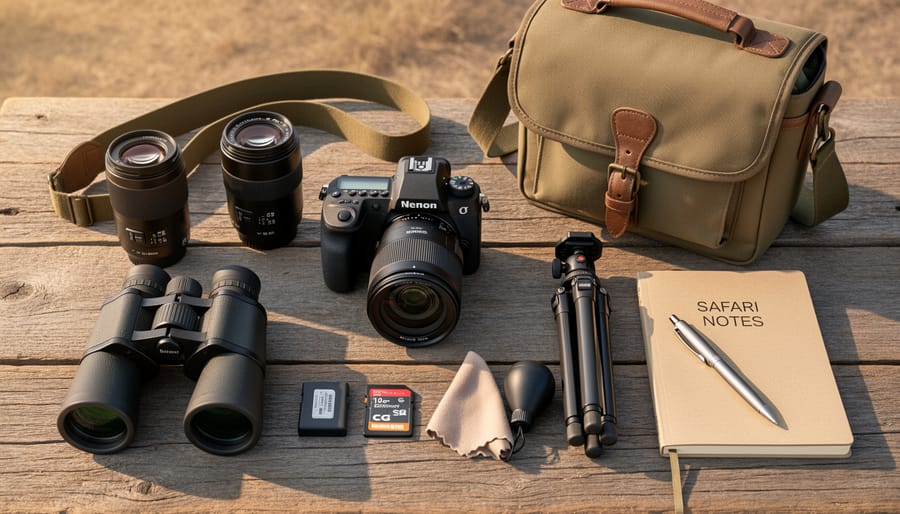
The good news? You don’t need thousands of dollars in equipment to capture memorable wildlife moments. Your smartphone camera has come a long way and works beautifully for distant landscape shots and quick animal encounters. The main challenge on safari is zoom capability—you’ll want to get closer to those animals than your phone typically allows. Consider a clip-on telephoto lens attachment to boost your range without breaking the bank.
Point-and-shoot cameras with optical zoom (look for 20x or higher) offer a sweet middle ground. They’re lightweight, budget-friendly, and require minimal learning curve. The downside? They struggle in low light during those magical dawn and dusk hours when wildlife is most active.
Entry-level DSLR or mirrorless cameras give you the most flexibility, especially when paired with a telephoto lens (a 70-300mm works great for beginners). Yes, there’s a learning curve, but modern cameras have excellent auto modes to start with. The investment pays off when you’re photographing that moose crossing a New Hampshire stream or capturing birds in flight. Local photography expert Sarah mentions that many families rent camera equipment before buying—a smart way to test gear during your safari adventure without the full commitment.
Accessories That Actually Make a Difference
You don’t need the fanciest gear to capture amazing wildlife moments, but a few smart accessories will save the day when you’re out in the field. Start with a quality lens cleaning kit – dust, moisture, and fingerprints happen constantly during outdoor adventures, and a blurry lens means missed opportunities. Pack at least one extra battery (cold weather drains them faster than you’d expect) and bring more memory cards than you think you’ll need. There’s nothing worse than deleting photos mid-safari to make room for new ones.
A weather-resistant camera bag protects your investment from unexpected rain and the bumps of trail hiking. Consider adding a simple rain cover for your camera too – even light drizzle can spell disaster for electronics. These practical items won’t break the bank, but they’ll keep you shooting confidently no matter what nature throws your way. Local photographers around Chesterfield often say the difference between okay photos and great ones comes down to being prepared for anything.
Camera Settings Made Simple for Wildlife Action
Shutter Speed: Freezing the Moment
Nothing frustrates safari-goers more than returning home to find their photos of a leaping deer or soaring hawk turned into a blurry mess! The secret to freezing those magical moments is shutter speed. Think of it as how quickly your camera blinks. For wildlife in motion, you’ll want a fast shutter speed of at least 1/500th of a second, though faster is even better for animals running or birds in flight.
Here’s a simple rule: if you’re photographing a grazing moose in the New Hampshire wilderness, 1/250th might work fine. But when that moose suddenly bolts or your kids spot a darting chipmunk, bump it up to 1/1000th or higher. Most modern cameras and even smartphones have sport or action modes that automatically adjust for movement. On sunny days, you’ll have plenty of light for fast shutter speeds. During dawn or dusk safari drives, increase your ISO setting to maintain that speed without losing too much brightness. Practice on your energetic kids or pets before the big trip!
The Magical Auto Modes You Should Actually Use
Here’s the good news: some automatic settings are absolutely your secret weapons! Continuous autofocus (often labeled AF-C) is a game-changer when tracking moving animals. Whether you’re photographing deer on a family camping trip or birds taking flight, this mode keeps adjusting focus as your subject moves. Pair it with burst mode, and you’ll capture those split-second moments that make incredible memories. Think of burst mode as taking multiple snapshots in rapid succession—perfect for when that chipmunk decides to scamper or a hawk suddenly takes off. These smart auto features let you focus on the experience while your camera handles the technical heavy lifting. Local wildlife photographer Tom Jenkins from Chesterfield always tells beginners: “Use continuous focus and burst mode together. You’ll delete some shots later, but you’ll never miss the moment.”
Composition Techniques That Tell Better Stories
Include Your Family in the Frame
Some of the most treasured safari photos aren’t just of the animals themselves, but of your children experiencing the wonder of seeing wildlife up close. Capture your daughter’s wide-eyed amazement when she spots her first moose, or your son pointing excitedly at a soaring hawk. These reaction shots tell the complete story of your adventure and become priceless keepsakes as your kids grow older.
Position family members in the foreground with animals or landscapes visible behind them. This approach creates context and shows the scale of your surroundings while keeping your loved ones central to the memory. Don’t worry about getting everyone perfectly posed—the candid moments of genuine excitement and curiosity often make the best photographs.
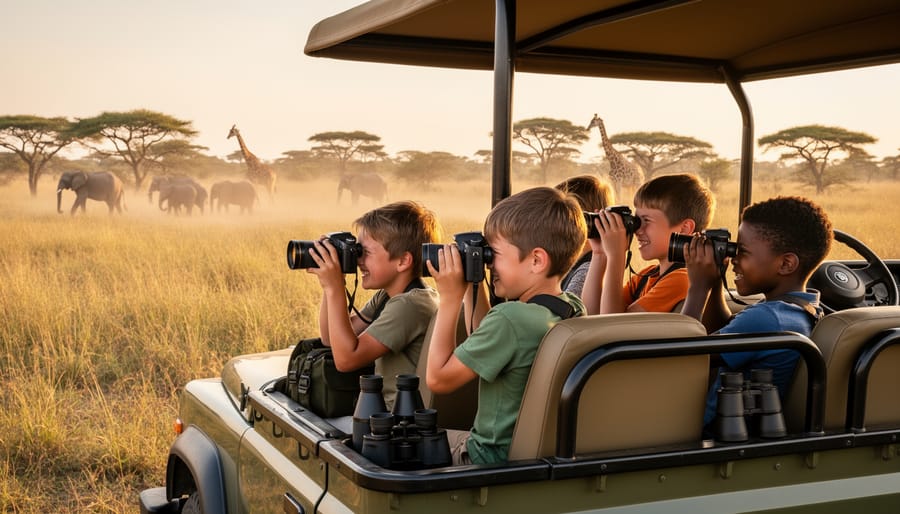
Encourage kids to bring their own cameras or smartphones too. Their unique perspective and enthusiasm might capture angles and moments you’d miss. Plus, involving them in the photography process keeps them engaged during quieter stretches of your wildlife watching journey, turning the entire experience into a collaborative adventure everyone can enjoy together.
When to Zoom In and When to Pull Back
Think of your safari photo collection like telling a complete story—you need both wide-angle establishing shots and intimate close-ups to bring the adventure to life. Start with sweeping landscape photos that capture the vastness of the savanna or the dramatic skies overhead. These images set the scene and show the incredible environment where wildlife thrives.
Then zoom in to capture the details that make your heart race: a lion’s intense gaze, the intricate patterns on a giraffe’s coat, or a baby elephant playfully splashing in a watering hole. These closer shots create emotional connections and reveal behaviors you might otherwise miss.
Don’t forget the middle ground either—photos showing animals in their habitat context, like a herd of zebras grazing beneath an acacia tree, beautifully combine environment and subject. Varying your perspectives throughout the day creates a dynamic photo album that transports viewers right into your safari experience, from the big picture moments to those precious details that made your trip unforgettable.
Practical Tips for Photographing From Vehicles and Trails
Safari photography from vehicles presents unique challenges, but with the right approach, you’ll capture stunning wildlife moments even when conditions aren’t perfect. Whether you’re on family trail adventures or embarked on a full-day wildlife tour, these practical strategies will help everyone in your group come home with fantastic shots.
Vehicle photography requires managing vibration and movement. When your safari vehicle stops for wildlife viewing, resist the urge to immediately start snapping photos. Take a moment to let the vehicle settle completely. If you’re shooting through an open window or roof, use a beanbag or rolled-up jacket positioned on the window frame to stabilize your camera. This simple trick dramatically reduces shake and delivers sharper images.
For steadier shots from moving or stationary vehicles, follow this process:
- Turn off your vehicle’s engine if you’re the driver, or ask your guide to do so when safely stopped
- Brace your elbows against your body or the vehicle frame, creating a stable triangle
- Exhale slowly and gently press the shutter button rather than jabbing it
- Take multiple shots in quick succession to increase your chances of capturing a perfectly sharp image
- Use your camera’s fastest shutter speed setting that still allows enough light for proper exposure
After stabilizing your position, focus on composition rather than just zooming in as far as possible.
When shooting through windows, position your lens as close as possible without touching the glass to minimize reflections. Turn off your camera flash, which will only create glare. If dust or scratches appear on windows, shift your angle slightly rather than wiping constantly.
Trail etiquette matters enormously for photography success. Stay quiet and move slowly, allowing wildlife to remain comfortable. Never ask guides to drive off-trail or approach animals too closely for a better shot. The best images come from patient observation, not from pressuring animals or disrupting their natural behavior. Remember, you’re guests in their home.
Getting Kids Involved Behind the Lens
Handing a camera to your child transforms them from passive observer to active storyteller, and the results might just surprise you! Even younger kids can capture incredible moments when given the right guidance and freedom to explore their creative vision.
Start by assigning age-appropriate missions that make photography feel like play rather than a chore. Younger children (ages 4-7) excel at simple challenges like “find five different colors in nature” or “photograph something tiny.” Older kids (ages 8-12) can tackle more complex assignments such as capturing animal behaviors, experimenting with different angles, or documenting the day’s journey from their perspective. You might even incorporate these photo missions into a nature scavenger hunt for double the engagement.
Consider giving each child their own camera, whether it’s a hand-me-down smartphone, an inexpensive point-and-shoot, or even a disposable camera for the youngest adventurers. The key is making it truly theirs—let them choose a colorful camera strap or personalize it with stickers. This ownership builds responsibility and pride in their work.
The magic continues long after the safari ends. Gather around the laptop or tablet and review everyone’s photos together. Resist the urge to critique too harshly—instead, ask questions like “What made you notice this?” or “What story does this picture tell?” If you’re editing your own images, invite kids to sit alongside you and make simple adjustments. They’ll love seeing how brightness, contrast, or cropping can transform their shots.
Create a family photo album or slideshow where everyone’s images share equal billing. When children see their photographs valued alongside yours, it reinforces that their unique perspective matters—and that’s worth more than any technically perfect shot.
Common Mistakes and How to Avoid Them
We’ve all been there—you spot an incredible animal, fumble with your camera, and end up with a blurry blob that barely resembles wildlife. Don’t worry! These common photography stumbles happen to everyone, and they’re surprisingly easy to fix.
The biggest mistake families make is shooting through dirty vehicle windows. It seems obvious, but in the excitement of spotting a moose or deer, we forget that smudges and dust create hazy photos. Simply carry a microfiber cloth in your pocket and give the window a quick wipe before you start shooting. This two-second habit makes an enormous difference in image clarity.
Another frequent pitfall is trying to zoom in too much on distant animals. Your camera’s digital zoom might promise to bring that elk closer, but it actually degrades your photo quality significantly. Instead, take the shot at your camera’s optical zoom limit and crop it later on your computer or phone. You’ll preserve much better detail this way.
Many safari-goers also struggle with timing, waiting for the “perfect” moment that never comes. Animals move unpredictably, so start clicking earlier than you think you should. Take multiple shots as the scene unfolds—you can always delete the extras later, but you can’t recapture a missed moment.
- Shooting with the sun behind you creates well-lit, vibrant images with great color saturation
- Photographing animals at rest allows time for composing thoughtful shots and checking settings
- Staying patient at one promising location often yields multiple species and natural behaviors
- Backlit animals create silhouettes unless you adjust exposure compensation upward by 1-2 stops
- Distant wildlife shots lose detail and impact compared to closer encounters with better composition
- Fast-moving animals require continuous shooting mode and higher shutter speeds to avoid motion blur
Remember, centering every animal in your frame creates static, uninteresting photos. Try positioning your subject slightly off-center, leaving space in the direction they’re looking or moving. This simple adjustment creates more dynamic, professional-looking images without requiring any technical expertise.
After the Safari: Simple Photo Organization and Sharing
You’ve made it home with hundreds of safari photos, and now comes the fun part: turning those memories into something you’ll actually revisit! Start by downloading everything to your computer within the first few days while the excitement is still fresh. Trust me, if you wait too long, those photos might sit on your camera card forever.
Begin your sorting process by creating folders for different days or locations. Take a first pass through all your images and delete the obvious misses—blurry shots, accidental ground photos, or duplicates where someone blinked. Don’t be too precious about it; most photographers keep only 10-20% of their shots.
For selecting your favorites, look for images that tell a story or capture emotion. That photo of your daughter’s face when she spotted her first elephant? That’s a keeper, even if it’s not technically perfect. Choose variety too—wide landscapes, close-up animal portraits, and candid family moments all work together to recreate the full experience.
Once you’ve narrowed down your collection, consider these creative options: create a photo book through an online service (they make fantastic coffee table conversation starters), set up a rotating digital frame in your living room, or host a slideshow party for friends and family. Local print shops can even help you create a custom safari gallery wall.
The key is actually doing something with your photos within a month of returning. Pick just one project to start—even selecting your top 20 images for a simple album counts as success!
The most memorable safari photos aren’t necessarily the sharpest or most technically perfect—they’re the ones that transport you back to that incredible moment when you locked eyes with a lioness or watched elephants gather at a watering hole as a family. Your wildlife safari photos should capture the wonder, excitement, and deep connection you feel when experiencing nature together.
Before you embark on that dream African safari, there’s no better practice ground than right here in Chesterfield and the surrounding Monadnock region. Start your photography journey with a backyard wildlife adventure, where you can test camera settings, experiment with different lighting conditions, and develop patience while waiting for that perfect shot of a visiting deer or red-tailed hawk. The skills you build photographing wildlife in familiar territory—understanding animal behavior, anticipating movement, and capturing authentic moments—translate directly to safari success.
Make local wildlife watching a regular family activity. Visit nearby trails during different times of day, practice keeping quiet and still, and learn to read the subtle signs that animals are nearby. When that once-in-a-lifetime safari opportunity arrives, you’ll be ready to create images that preserve those magical family memories forever.