
Choose a tent with double-stitched seams, reinforced corners, and a bathtub-style floor to create an impenetrable barrier against ground moisture and driving rain. Master tent camping in challenging conditions by investing in ripstop nylon or polyester tents rated for three-season or four-season use, featuring a minimum 2000mm hydrostatic head rating. Secure your shelter with aircraft-grade aluminum poles and heavy-duty stakes that won’t bend under pressure from high winds or storms common in New Hampshire’s varied climate.
Nothing ruins an outdoor adventure faster than a leaky tent in the middle of a downpour. Whether you’re planning a weekend in Pisgah State Park or embarking on a longer expedition through the White Mountains, a weather-resistant tent serves as your dependable fortress against nature’s elements. The right combination of materials, construction, and smart design features transforms your camping experience from merely surviving to truly thriving in any weather condition.
Understanding Weather Resistance in Camping Tents
Water Resistance Ratings Explained
When it comes to keeping you dry in wet weather, a tent’s water resistance rating (or hydrostatic head) is your best friend. Think of it as your tent’s rain defense score – the higher the number, the better it handles water. A rating of 1,000mm means your tent can withstand light rain, while 2,000mm will keep you comfortable in moderate rainfall. For serious weather protection, look for ratings of 3,000mm or higher.
Here in New England, where we often experience sudden afternoon showers, we recommend tents rated at least 2,000mm for summer camping. For spring and fall adventures, when rainfall tends to be heavier, opt for 3,000mm or higher. The rating actually tells you how many millimeters of water pressure your tent’s fabric can handle before leaking – pretty neat, right?
Remember that these ratings apply to both your tent’s rainfly and floor. While the rainfly might be 2,000mm, you’ll want a higher rating of at least 3,000mm for the floor since it deals with both rain and ground moisture.
Essential Weather-Resistant Features
When it comes to essential tent features, weather resistance is your first line of defense against Mother Nature’s surprises. The magic starts with sealed seams, which prevent water from sneaking through the stitching. Look for tents with factory-sealed or taped seams – they’re like tiny umbrellas for every stitch in your tent’s fabric!
A quality rainfly is your tent’s superhero cape, creating an extra barrier between you and the elements. The best ones extend well beyond the tent walls and include vents to prevent condensation buildup. Here in Chesterfield, where afternoon thunderstorms can pop up unexpectedly, a full-coverage rainfly is absolutely worth the investment.
Don’t overlook those handy storm flaps! These protective layers cover your tent’s zippers and provide crucial protection against wind-driven rain. The best designs include multiple storm flaps and reinforced corners that work together to keep your camping haven dry and cozy, even during those famous New England weather shifts. When properly secured, these features transform your tent into a weather-beating fortress that lets you focus on enjoying the great outdoors rather than worrying about staying dry.

Top Weather-Resistant Tent Materials
Traditional vs. Modern Fabrics
When it comes to weather resistance, the choice between traditional and modern tent fabrics can make all the difference in your outdoor experience. Canvas, the time-tested classic, offers excellent breathability and a cozy, cabin-like feel. It’s naturally water-resistant when properly treated and maintains a comfortable interior temperature in both hot and cold weather. Many local campers swear by canvas for its durability and ability to handle New Hampshire’s varied climate.
Modern synthetic materials like nylon and polyester have revolutionized tent design with their lightweight properties and enhanced weather resistance. Nylon tents are incredibly light and pack down small, making them perfect for backpacking through our local trails. They dry quickly after rain and resist UV damage well. Polyester, while slightly heavier than nylon, holds its shape better when wet and typically costs less.
Each material has its sweet spot for different camping styles. Canvas excels for extended stays and base camping, especially during our crisp autumn nights. Nylon shines for lightweight adventures and summer hiking trips, while polyester offers an excellent middle ground for family camping and occasional weekend getaways.
The good news is that modern manufacturing techniques have improved all these materials. Today’s canvas tents feature better waterproofing, while synthetic options have enhanced durability and UV resistance compared to their earlier versions.
Coating Technologies
When it comes to keeping you dry and comfortable in your tent, the magic happens in the coating. Modern tents use three main types of weather-resistant treatments that work like invisible shields against the elements.
DWR (Durable Water Repellent) is like giving your tent a raincoat. This coating makes water bead up and roll right off the fabric instead of soaking in. Picture raindrops playing hopscotch on your tent’s surface! While DWR is fantastic for light rain, it does need occasional reapplication to maintain its effectiveness.
Silicone treatments are the heavy-duty champions of waterproofing. They create an incredibly slick surface that water simply can’t penetrate. Many experienced campers swear by silicone-treated tents for their outstanding durability and long-lasting protection. These coatings are particularly great for our unpredictable New England weather patterns.
Polyurethane (PU) coatings are like adding a rubber-like layer to your tent’s fabric. They’re especially effective on tent floors and rain flies, creating a reliable barrier against ground moisture and sustained rainfall. PU coatings come in different thicknesses – the higher the number, the better the protection.
Remember, even the best coating needs proper care. Regular cleaning and careful storage will help these protective layers last longer, keeping you cozy and dry on your outdoor adventures.

Setting Up for Success in Rough Weather
Strategic Placement Tips
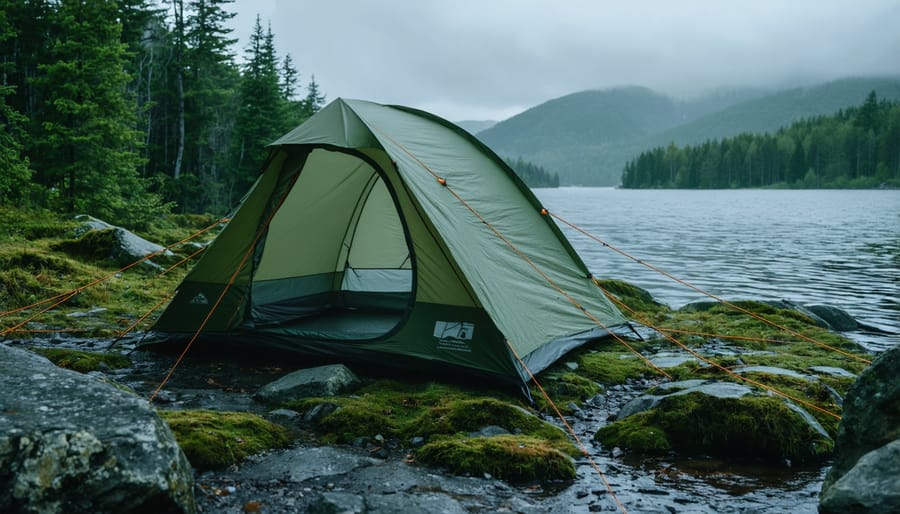
Choosing the perfect spot for your weather-resistant tent can make the difference between a cozy camping experience and a challenging one. Start by seeking higher ground to prevent water pooling around your tent during rainfall. However, avoid hilltops where strong winds could test even the most robust tent design. Look for natural windbreaks like large boulders or dense tree lines, positioning them to shield your tent from prevailing winds.
When it comes to staying dry while camping, orient your tent’s entrance away from the typical wind direction. In Chesterfield, winds often blow from the northwest, so positioning your tent’s rear to face this direction can help deflect harsh weather. Clear the ground of sharp objects and debris, and look up to ensure there are no dead branches overhead that could fall during storms.
For extra protection, create shallow drainage trenches around your tent if rain is expected, ensuring they direct water away from your camping area. Remember to maintain a safe distance from water sources – at least 200 feet from lakes or streams – as weather can cause unexpected water level changes. These strategic choices will significantly enhance your tent’s weather-resistant capabilities and your overall camping experience.
Additional Weather Protection Measures
Even the most weather-resistant tent needs proper setup and additional protection to perform at its best. Start with a quality groundsheet (also called a footprint) that’s slightly smaller than your tent’s floor. This creates a crucial barrier against ground moisture and helps prevent wear and tear on your tent’s base.
When it comes to guylines, more is definitely better! Use all the attachment points your tent provides, especially in windy conditions. Keep your guylines taut but not overly tight, and angle them at roughly 45 degrees for optimal stability. During setup, position them to channel water away from your tent’s entrance.
Stake selection and placement are equally important. For Chesterfield’s varied terrain, pack a mix of stakes – standard ones for normal ground conditions and specialized sand or rocky-soil stakes when needed. Drive stakes in at a 45-degree angle away from the tent for maximum holding power. Pro tip: bring extra stakes – they’re lightweight and can be lifesavers if you lose or bend one.
For added protection in heavy rain, consider creating a slight trench around your tent to direct water flow away from your camping space. Remember to fill it in before breaking camp to follow Leave No Trace principles.
Maintenance for Longevity
Regular Maintenance Steps
Keep your weather-resistant tent in top shape with these simple maintenance steps. After each camping trip, set up your tent at home and gently clean it with mild soap and warm water, using a soft sponge to remove dirt and debris. Pay special attention to zippers and seams, where grime tends to accumulate. Let your tent dry completely before storage to prevent mold and mildew.
Every 6-12 months, check your tent’s waterproof coating by spraying it lightly with water. If you notice the water no longer beads up, it’s time to reapply a waterproof treatment. Choose a DWR (Durable Water Repellent) spray specifically designed for tent fabric, and apply it evenly on a warm, dry day.
Store your tent loosely in a breathable storage bag in a cool, dry place – never compressed in its stuff sack for long periods. Before heading out on your next adventure, double-check all seams and repair any small tears with seam sealer or repair tape. These simple steps will help your tent stay weather-resistant for many seasons of outdoor fun in our beautiful New Hampshire wilderness.
Storage Best Practices
Proper storage is key to maintaining your tent’s weather resistance for years to come. Never pack away your tent while it’s damp – instead, set it up in a dry, shaded area or hang it over a clothesline until completely dry. This prevents mildew and preserves the waterproof coating. Before storing, gently clean off any dirt or debris with a soft brush and lukewarm water, avoiding harsh detergents that could damage the weather-resistant treatments.
Roll your tent instead of stuffing it into its bag, as folding along the same lines repeatedly can create weak points in the fabric and coating. Store your tent in a cool, dry place away from direct sunlight – a closet or storage bin works perfectly. Consider using a breathable storage bag rather than the original stuff sack to allow better airflow.
Before your next adventure, set up your tent at home to check for any issues with the weather-resistant coating or seams. This gives you time to apply seam sealer or waterproofing spray if needed, ensuring you’re prepared for whatever Mother Nature throws your way.
Local Testing Grounds
Ready to put your weather-resistant tent to the test? Chesterfield offers diverse landscapes and weather conditions perfect for gear testing before your big adventures. As experts in seasonal camping in New England, we’ve identified the best local spots to evaluate your tent’s performance.
Pisgah State Park stands out as our top testing ground, featuring exposed ridgelines where you can experience varying wind conditions. The park’s mix of sheltered valleys and highland areas lets you assess your tent’s stability in different environments. Camp near Echo Lake to test water resistance during dewy mornings and unexpected showers.
For wind resistance testing, head to the Chesterfield Gorge Natural Area. The terrain creates natural wind tunnels, perfect for checking your tent’s stability and guyline effectiveness. The area’s elevation changes also mean you’ll encounter different temperature zones, ideal for testing ventilation and condensation management.
Don’t miss Wantastiquet Mountain Natural Area, where you can experience rapid weather changes typical of New England. The summit area offers excellent exposure to elements, while the protected lower slopes provide controlled testing conditions. Local tip: camp here during spring or fall when weather patterns are most variable.
Bear Brook State Park’s varied terrain provides multiple testing scenarios in one location. From open meadows to forest clearings, you’ll find spots to test against morning dew, afternoon heat, and evening temperature drops. The park’s designated camping areas also make great baseline testing grounds before venturing into more challenging conditions.
Remember to check weather forecasts and obtain necessary permits before testing. These locations offer safe, accessible environments to ensure your tent performs as expected when you need it most.
As we’ve explored, investing in a weather-resistant tent is crucial for ensuring safe and enjoyable outdoor adventures, regardless of what Mother Nature has in store. From understanding essential features like waterproof ratings and sealed seams to choosing the right materials and construction, you’re now equipped with the knowledge to make an informed decision about your next tent purchase.
Remember that the best weather-resistant tent for you depends on your specific needs, camping style, and the conditions you’ll face. Whether you’re planning a family camping trip in the height of summer or preparing for a challenging shoulder-season adventure, prioritize features that match your requirements and environment.
Don’t forget to properly maintain your tent by regularly cleaning it, checking seams, and storing it correctly. These simple steps will extend its life and ensure it remains weather-resistant for years to come. Also, always test your tent before heading out on a major expedition, and pack essential repair supplies just in case.
The great outdoors is calling, and with the right weather-resistant tent, you’ll be ready to answer that call confidently. From peaceful summer nights under the stars to weathering unexpected storms, your tent will be your home away from home. So gear up, check the forecast, and start planning your next outdoor adventure – your perfect weather-resistant tent awaits!